|
|
|
Who's Online
There currently are 5869 guests online. |
|
Categories
|
|
Information
|
|
Featured Product
|
|
|
 |
|
|
There are currently no product reviews.
 ;
This GRUNDIG UV5A Owner Manual is not only an instruction manual but a total functional circuit description of the Multimeter and includes circuit diagram at the end pages. It is very helpful for repairing and calibrating the instrument. It is written in two languages English and German for international support. It was very easy to repair my unit with this document. Regards, Regis Pauly, Electrical Engineer.
;
The owner's manual was evetything I thought it would be. I was able to print it out using both sides of the paper in quick order, saving me a search online for a used one.
 ;
Хорошее качество сканирования.
Мануал пришел часов эдак через 12. В целом доволен.
;
Fantastic quality and impressive delivery time. Based on this manual, I recommend this service without hesitation! Five Stars for certain.
;
Was happy to find the complete owners manual... It's all in there, just like the original...
OVEN USE
Odors and smoke are normal when the oven is used the first few times, or when it is heavily soiled. IMPORTANT: The health of some birds is extremely sensitive to the fumes given off. Exposure to the fumes may result in death to certain birds. Always move birds to another closed and well ventilated room.
Timer
The Timer can be set in minutes and seconds or hours and minutes up to 11 hours, 59 minutes, and counts down the set time. The Timer does not start or stop the oven
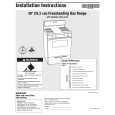
Electronic Clock/Timer
(on some models)
1 2 3
To Set:
1. Touch TIMER. The colon will flash during Timer programming. 2. Touch the �up� or �down� arrow pads to set length of time. 3. Touch TIMER. The Timer will begin counting down 5 seconds after the time is set. To display the time of day while the Timer is counting down, touch CLOCK. Time of day will be displayed 5 seconds before returning to the Timer countdown. When there is one minute of time remaining, the display will begin counting down in seconds. When the Timer reaches zero, the display will show �End� and four 1-second tones will sound. To Cancel: Touch TIMER twice in the Timer mode.
5
1. Clock
4
3. Increase 4. Decrease 5. Timer
Aluminum Foil
IMPORTANT: Do not line the oven bottom with any type of foil, liners or cookware because permanent damage will occur to the oven bottom finish. s On those models with bottom vents, do not block or cover the oven bottom vents.
s
2. Display
Display
When power is first supplied to the range, �12:00� will appear on the display. If �12:00� appears at any other time, a power failure has occurred. Reset the Clock. See �Clock� section. Any time the Timer is not in use, the display will show the time of day.
Do not cover entire rack with foil because air must be able to move freely for best cooking results. To catch spills, place foil on rack below dish. Make sure foil is at least 1 in. (2.5 cm) larger than the dish and that it is turned up at the edges.
s
Clock
This is a 12-hour clock and does not show a.m. or p.m.
IMPORTANT: Never place food or bakeware directly on the oven door or bottom. Permanent damage will occur to the porcelain finish.
Positioning Racks and Bakeware
To Set:
Before setting, make sure the Timer is off. 1. Touch CLOCK. The colon will flash during Clock programming. 2. Touch the �up� or �down� arrow pads to set the time of day. The time can be changed in either small or 10-minute increments by touching a pad briefly or by touching and holding a pad. 3. Touch CLOCK. The colon will stop flashing when the Clock is active.
RACKS
Position racks before turning the oven on. Do not move racks with bakeware on them. Make sure racks are level. For best performance, cook on one rack. Place the rack so the top of food will be centered in the oven. To move a rack, pull it out to the stop position, raise the front edge, then lift out.
FOOD Frozen pies, large roasts, turkeys, angel food cakes Bundt cakes, most quick breads, yeast breads, casseroles, meats Cookies, biscuits, muffins, cakes, nonfrozen pies RACK POSITION 1 or 2
2
2 or 3
8
|
|
|
> |
|