|
|
|
Who's Online
There currently are 6043 guests online. |
|
Categories
|
|
Information
|
|
Featured Product
|
|
|
 |
|
|
There are currently no product reviews.
 ;
Clear and easy to read. All details as expected. Price acceptable , and quick delivery.
 ;
Quick response and exactly what I was looking for and at a great fair price!
;
5 star quality on these downloadable manuals. Easy to read and all the information is there. A must when doing a custom install or needing to service your precious old school electronics.
;
So usefull to make my installation a breeze. 5 stars on quality.
;
very helpful, the information in these manuels are very detailed
Special
tips
l
. Keep the kitchen well ventilated during the Self-Cleaning cycle to help get rid of heat, odors, and smoke. After the oven is cool, wipe up any l residue or ash with a damp cloth or sponge. If any spots remain, clean with a mild abrasive cleanser or cleaning sponge.
l
If the Self-Cleaning cycle does not get the oven as clean as you expected, the cycle may not have been set long enough or you may not have prepared the oven properly. Set the Self-Cleaning cycle longer the next time and hand-clean areas noted on page 25.
Clean the oven before it gets heavily soiled. Cleaning a very soiled oven takes longer and results in more smoke than usual.
How the cycle
works
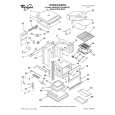
The Self-Cleaning cycle uses very high heat to burn away soil and grease. During the cycle, the oven gets much hotter than it does for normal baking or broiling. This high heat breaks up the soil or grease and burns it away. We recommend a 3-hour Self-Cleaning cycle. However, you can adjust the cycle time to the amount of soil in your oven. You can set the cycle anywhere between 2 and 4 hours. (See �Setting the controls� on page 26.) The graph at the right is representative of a normal, 3-hour Self-Cleaning cycle. Note that the heating stops when the 3-hour setting is up, but it takes longer for the oven to cool enough to unlock.
CCOLlNGFANlURNSOFF ANO WOR WLOCKS
START
1
Time
1: Hours
3
STOP
28
|
|
|
> |
|