|
|
|
Who's Online
There currently are 6043 guests online. |
|
Categories
|
|
Information
|
|
Featured Product
|
|
|
 |
|
|
There are currently no product reviews.
 ;
It was easy to order and received exactly what I needed. Only complaint would be the 24 hours you have to wait.
 ;
Manual was delivered in a timely manner and was all in English as advertised. The manuals I received when we moved into our flat were in German, Italian, and French. Having never used a steamer before, and not speaking/reading German very well, I needed an English Manual. this was a huge help.
;
Great Manual. This manual is available no where else. It was exactly what I was looking for. Only in German.
;
This GRUNDIG UV5A Owner Manual is not only an instruction manual but a total functional circuit description of the Multimeter and includes circuit diagram at the end pages. It is very helpful for repairing and calibrating the instrument. It is written in two languages English and German for international support. It was very easy to repair my unit with this document. Regards, Regis Pauly, Electrical Engineer.
;
The owner's manual was evetything I thought it would be. I was able to print it out using both sides of the paper in quick order, saving me a search online for a used one.
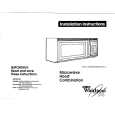
Caring for the Filters
The grease filters should be removed and cleaned often, at least once a month. NOTE: if your microwave hood combination is installed to recirculate air, the charcoal filter [Part No. 4358003) should be replaced every 6-12 months. The charcoal filter can not be cleaned.
1.
For your personal safety, turn off the electric power at the main power supply.
2. To remove slide each
grease filters, filter to the front.
Pull filters downward and push to the rear. The filter will drop out.
3. Soak grease filters in hot water and a mild detergent. Scrub and swish to remove embedded dirt and grease. Rinse welt and shake to dry. Do not use ammonia or place in a dishwasher. The aluminum will darken.
4. To replace grease filters, slide filter in the frame slot on the front of the opening. Push filter upward and push to the rear to lock into place.
5. To replace charcoal filter: remove the vent cover mounting screws. 6. Tip the cover forward, lift out to remove. then
7. Lift the back of the charcoat filter. Slide the filter straight out.
8.
Slide a new charcoal fitter into place. The filter should rest at the angle shown.
9. Slide the bottom of the vent cover into place. Push the top until it snaps into place. Replace the mounting screws. 18. Turn the power back at the main power SUPPlY. on
11. Do not operate the hood without the filters in place.
28
|
|
|
> |
|