|
|
|
Who's Online
There currently are 5684 guests online. |
|
Categories
|
|
Information
|
|
Featured Product
|
|
|
 |
|
|
There are currently no product reviews.
 ;
Fast service, document is OK. Thanks! Searched for it long time.
 ;
I was very pleased with the manual I got for my amateur (ham) radio. Without it I could not figure out how to input and/or change the P/L setting on my radio. It drove me nuts as the radio was essentially useless. That all changed when my manual came. Then it took only minutes and I was done. Now my radio works fine. This is an exceptionally good resource as it's a very easy and user friendly download. Thank you very much! Dziękujemy za!
;
It answered my question, which was how to load the paper. I did notice that the very end of the manual was not visible.
;
The product manual I received was exactly what I was looking for, delivered painlessly at a very fair price. I can't ask for any more than that.
;
Very well done!!!!! congratulations. It was a bit longer than usual the wiating time even if it was on time (in 24 hours).
Care and Cleaning
Bowl, white flat beater and white spiral dough hook may be washed in an automatic dishwasher. Or, clean them thoroughly in hot sudsy water and rinse completely before drying. Wire whip, burnished spiral dough hook and burnished flat beater should be hand washed and dried immediately. Do not wash wire whip, burnished spiral dough hook and burnished flat beater in a dishwasher. Do not store beaters on shaft. NOTE: Always be sure to unplug Stand Mixer before cleaning. Wipe Stand Mixer with a soft, damp cloth. Do not use household/commercial cleaners. Do not immerse in water. Wipe off beater shaft frequently, removing any residue that may accumulate.
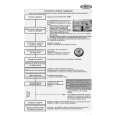
Beater to Bowl Clearance
Your Stand Mixer is adjusted at the factory so the flat beater just clears the bottom of the bowl. If, for any reason, the flat beater hits the bottom of the bowl or is too far away from the bowl, you can correct the clearance easily. 1. Unplug Stand Mixer. 2. Place bowl lift handle in down position. 3. Attach flat beater. 4. Adjust so flat beater just clears bottom surface of bowl when in lifted position by turning screw (A) clockwise to raise the bowl and counterclockwise to lower the bowl. Just a slight turn is all that is required: the screw will not rotate more than 1�4 turn (90 degrees) in either direction. (The full range of adjustment is 1�2 turn, or 180 degrees.) 5. Place bowl lift handle in up position to check clearance. 6. Repeat steps 4 and 5 if necessary. NOTE: When properly adjusted, the flat beater will not strike on the bottom or side of the bowl. If the flat beater or the wire whip is so close that it strikes the bottom of the bowl, coating may wear off the beater or wires on whip may wear.
A
10
|
|
|
> |
|